How to change the address for storing accounting documentation in the CEIDG?
Justyna Chmielińska
Łukasz Gągała
4/7/2024
Remember that every change of address for storing accounting documentation must be reported. In this article, we show you step by step how to easily update your information in the CEIDG – without even leaving your office.
Find out how to complete the online application and what to pay attention to so that everything goes smoothly. Below, we’ve prepared a step-by-step guide to help you through the process.
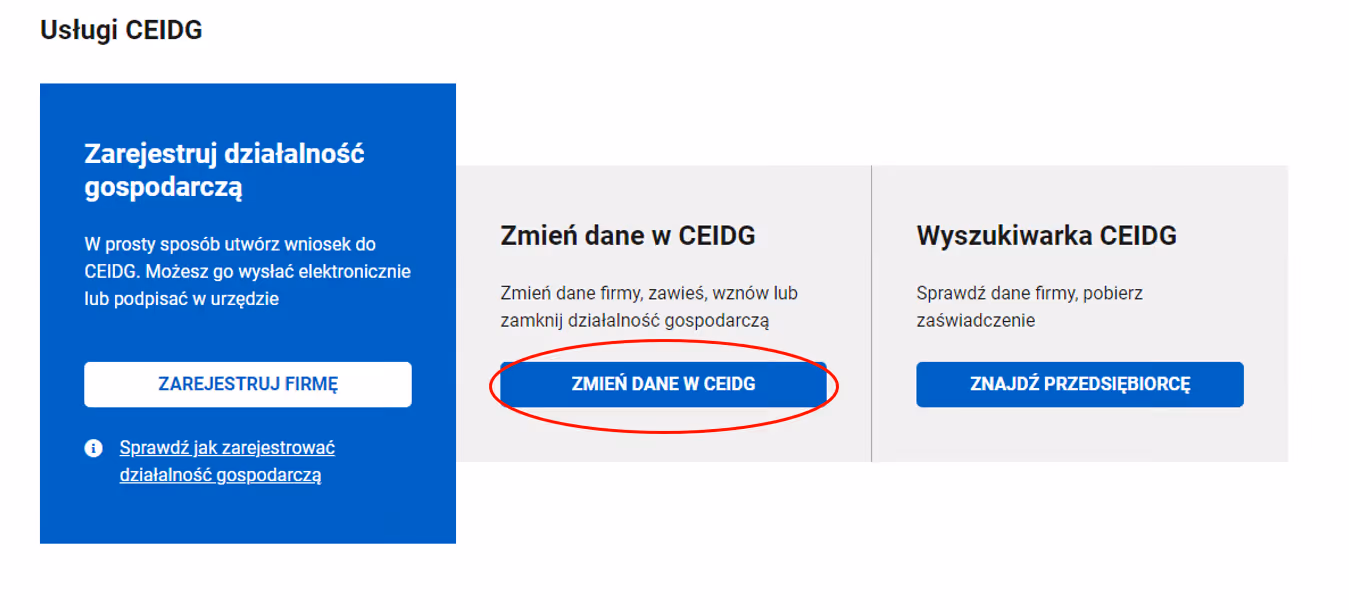
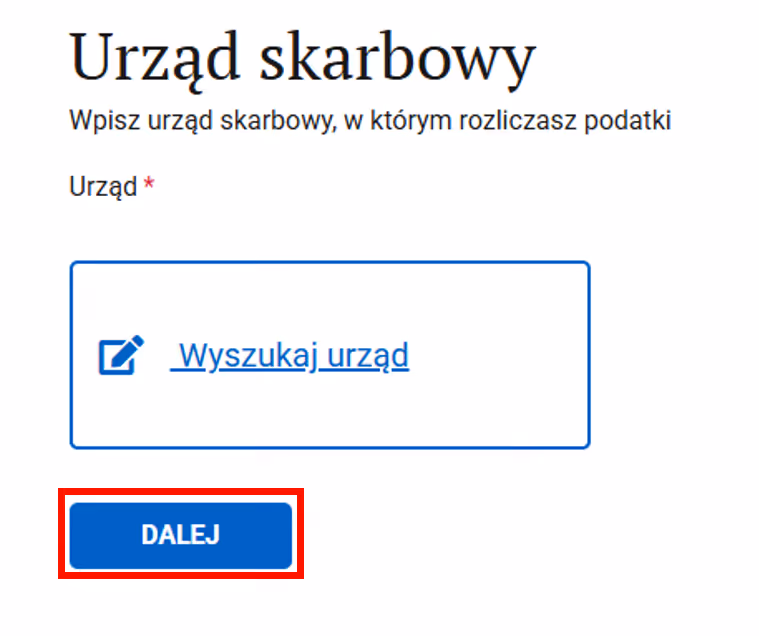
Step 1. The change of address for storing accounting documentation is done via biznes.gov website, where you should select "Zmień dane w CEIDG" (Change data in CEIDG).
Website adress: https://www.biznes.gov.pl/pl
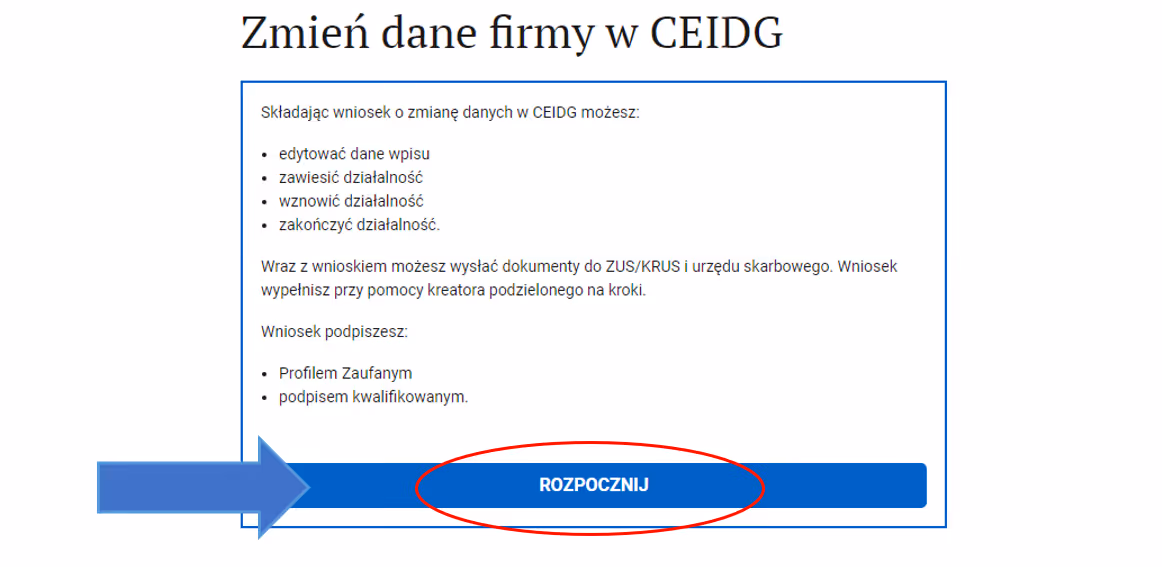
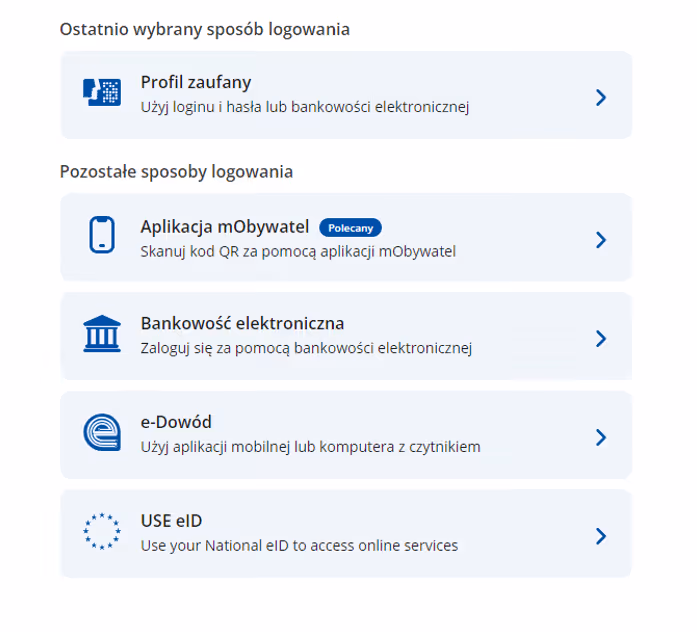
Step 2: Select "Rozpocznij" (Start). Then log in using your preferred method (most commonly your Trusted Profile - Profil Zaufany).
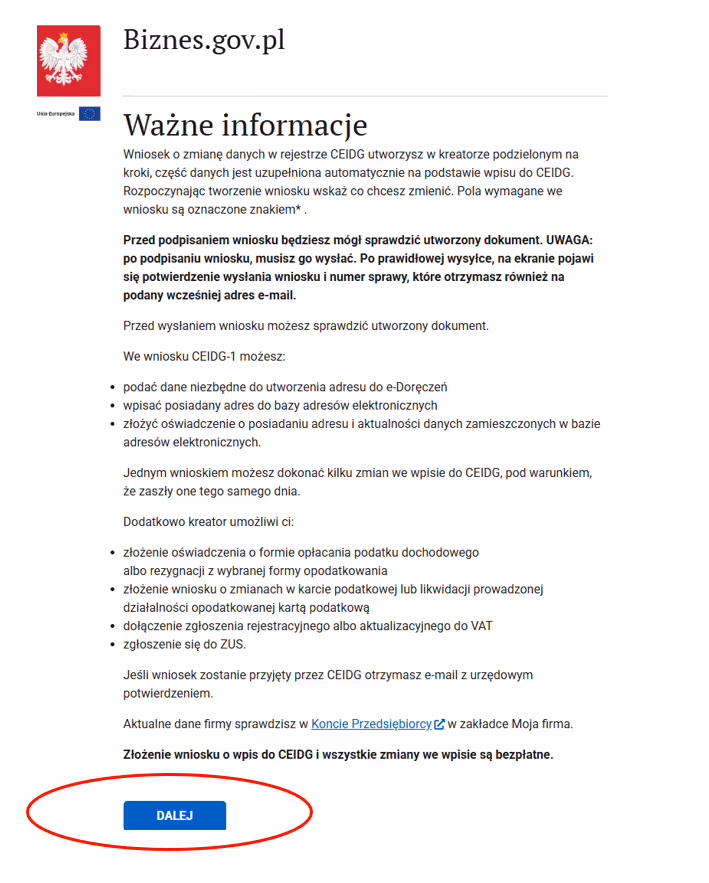
Step 3: A message containing important information will appear - read it if you wish. Then click "Dalej" (Next) to proceed.
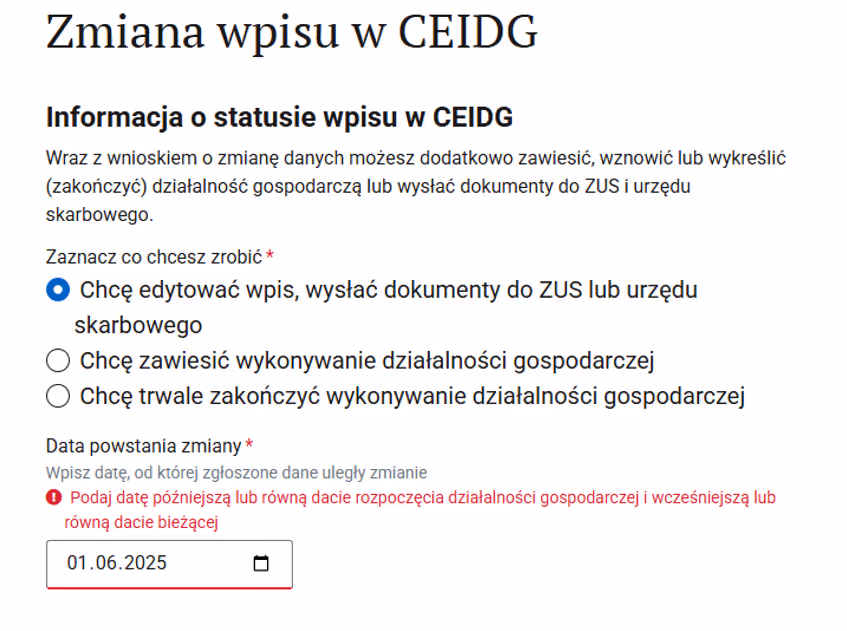
Step 4: Now the most important part - select the option "Chcę edytować wpis, wysłać dokumenty do ZUS lub urzędu skarbowego" (I want to edit the entry, send documents to ZUS or the Tax Office). Choose June 1, 2025 - as the effective date of the change - this is the date from which our company's address is changed.
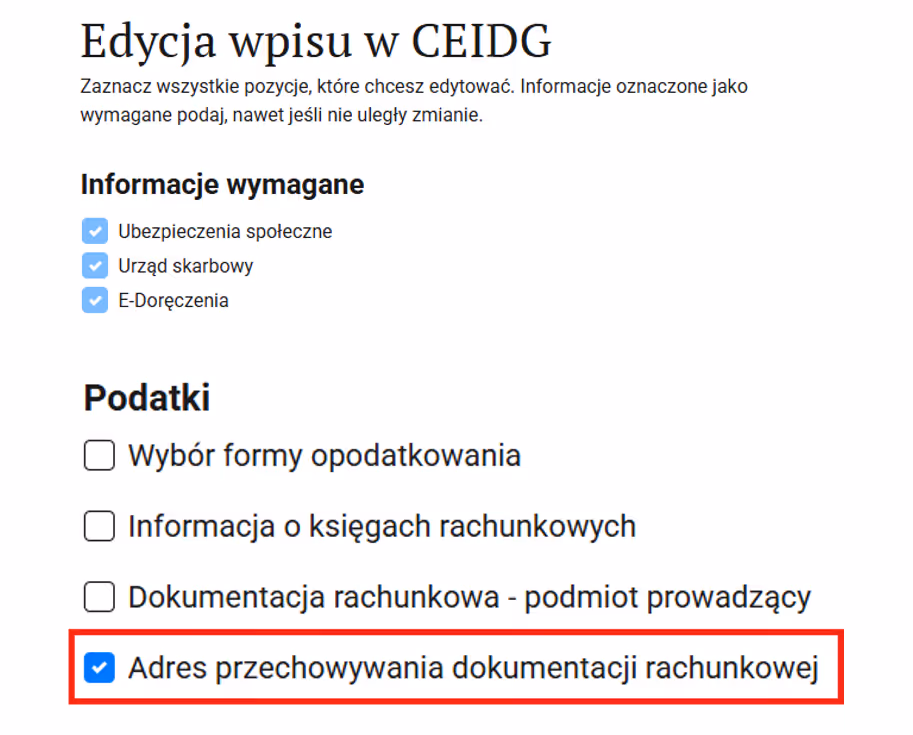
Step 5: Choose what you want to change. In the "Podatki" section (Taxes), select"Adres przechowywania dokumentacji rachunkowej" (Address for storing accounting documentation).
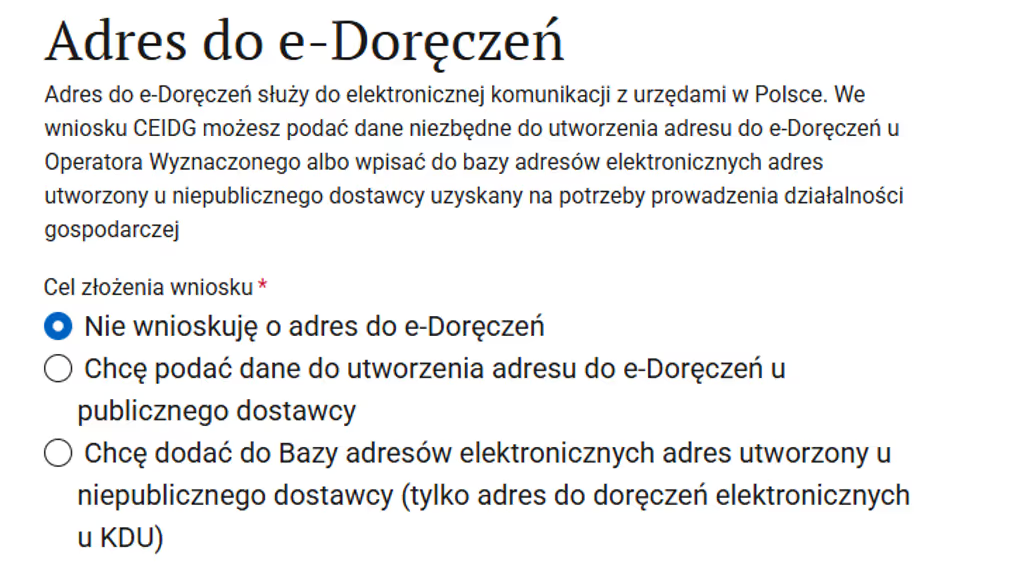
Step 6: In the next step, you can apply for an e-Delivery address. This can be skipped by selecting "Nie wnioskuję o adres do e-Doręczeń" (I do not apply for an e-Delivery address).
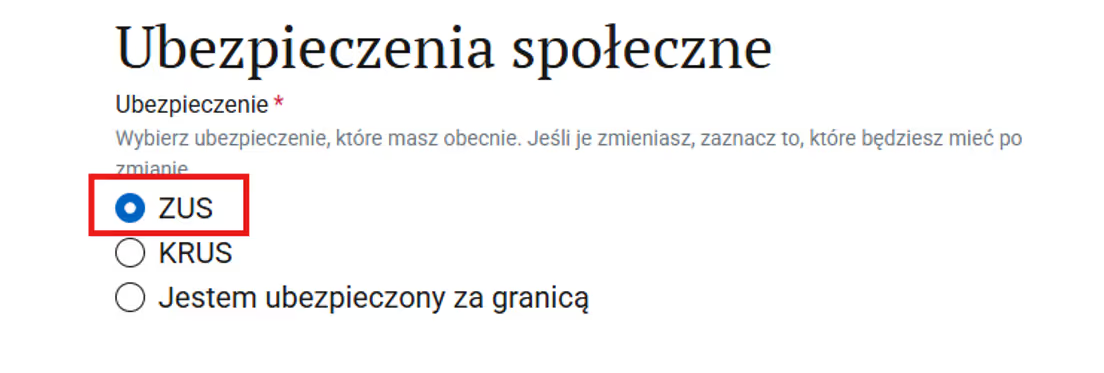
Step 7: Choose ZUS (social security) - typically it is selected.
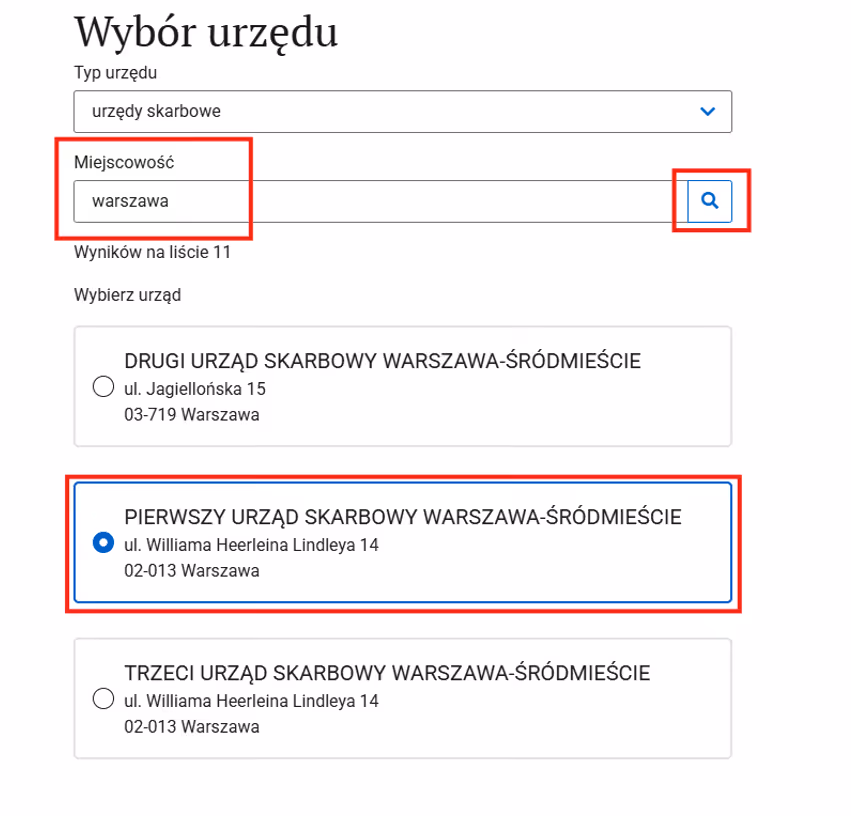
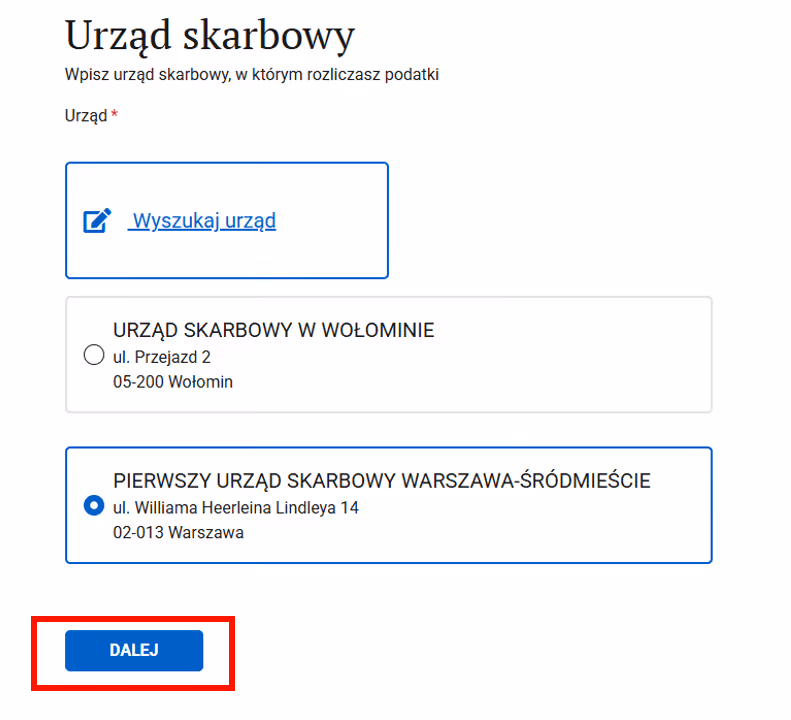
Step 8: Choose the Tax Office relevant to your business. A search window will appear. Enter your city and select the correct tax office. For example, if your tax office is First Tax Office Warszawa - Śródmieście, type "Warszawa" and then select your specific office. Verify that the selected Tax Office is correct. Make sure it is marked as the appropriate one. Then click "Dalej" (Next).
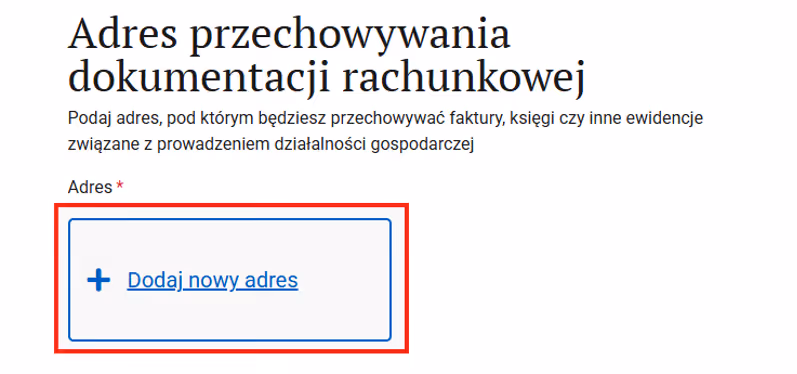
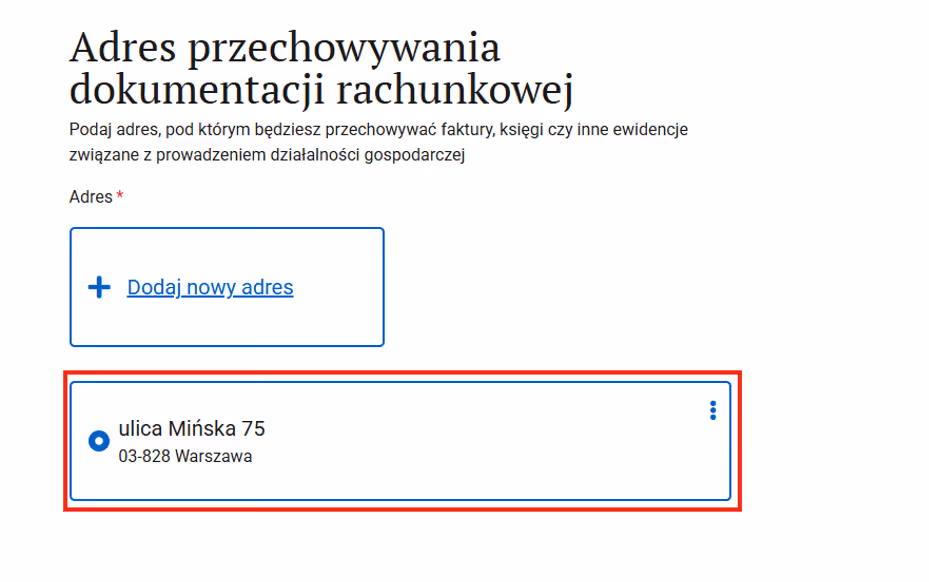
Step 9: Select "Dodaj nowy adres" (Add a new address).
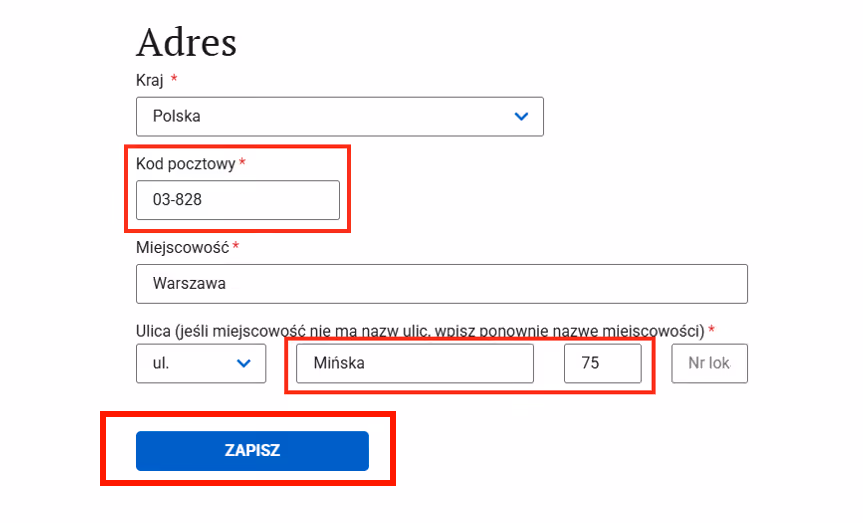
Step 10: Enter the details of our new office address - it’s helpful to first input the postalcode (03-828), as the city name (Warsaw) will then be filled in automatically. Then, enter the street name (Mińska) and number (75).
Step 11: Select the newly created address (ul. Mińska 75, 03-828 Warszawa).
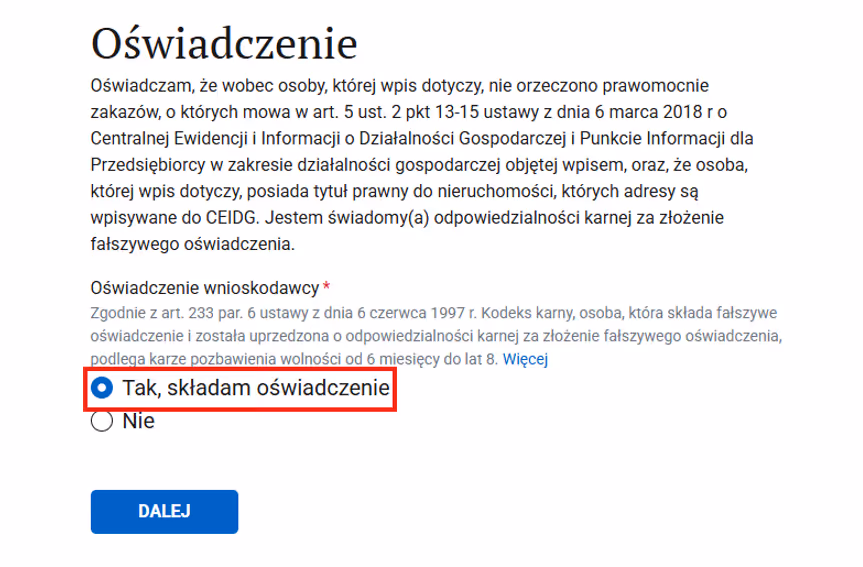
Step 12: Fill in the declaration (there’s nothing unusual here, but it’s still worth reading).
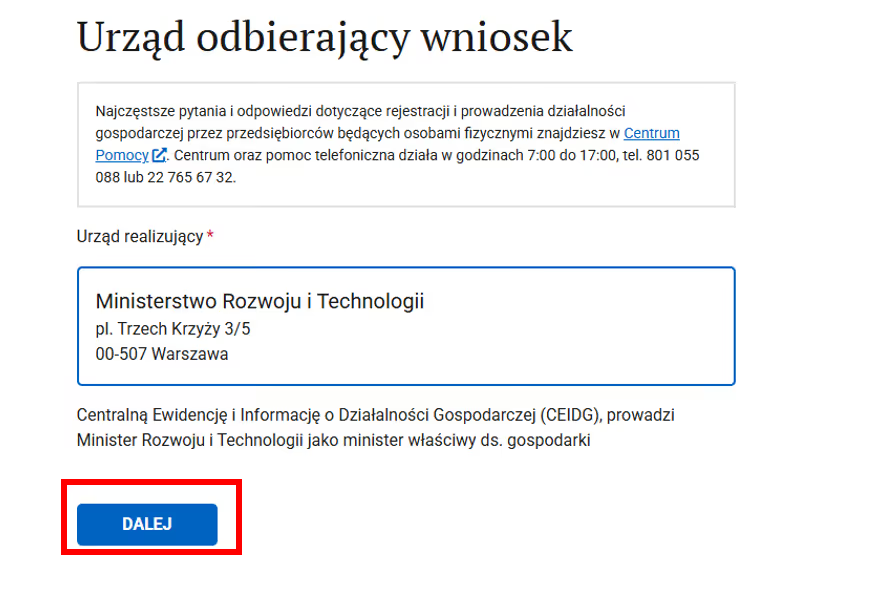
Step 13: Indicate the Receiving Office - select the default option.
Step 14: A summary message of the entire process will appear. Choose "Dalej” (Next).
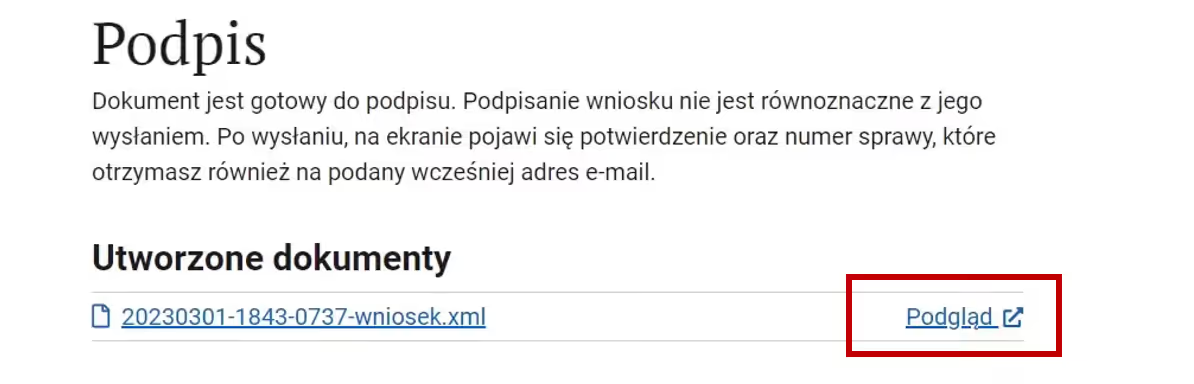
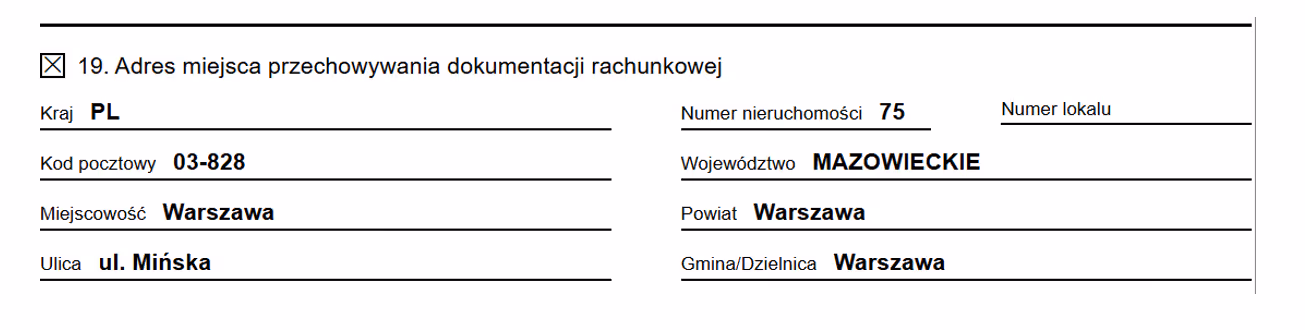
Step 15: Open the preview of the file and verify that field 19 in the application is completed correctly.
Correctly filled point 19 is shown here:
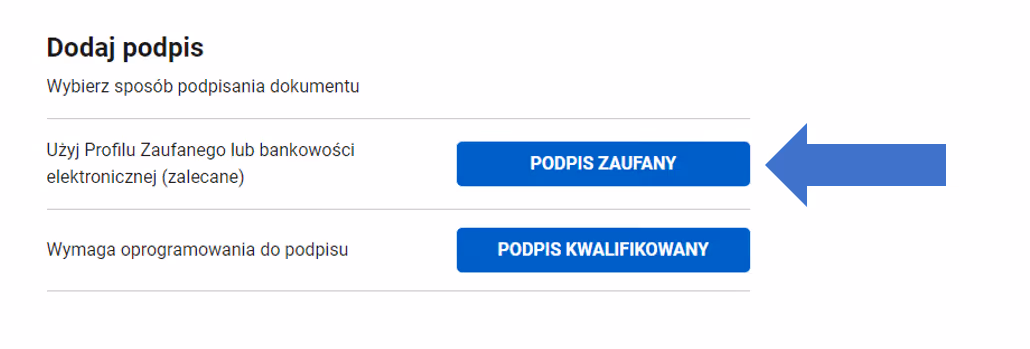
Step 16: Sign the document using your Trusted Profile, Qualified Signature, or Online Banking.
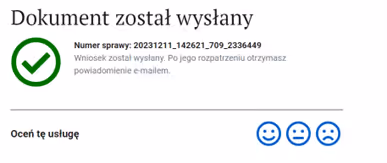
Step 17: After successfully signing, submit the application pressing "Wyślij" (Send).
All done! You will receive a message confirming that your application has been sent. This completes the entire procedure.
By clicking "Accept", you agree to the storing of cookies on your device in order to maintain your user preferences and collect analytical data. We do not use cookies to present personalized advertising content.